Taper Face Command
Note: Only available for Innovative Parts.
Taper Face allows the user to add a specified taper to the face(s) relative to a selected draft plane. The Taper Face Command Browser is accessed either by first selecting the Taper Face option from the Face/Edge Edit toolbar or Modify menu and then selecting a face, selecting Taper Face in the Quick Access Property Browser Actions when a face is selected, or by right clicking on a selected face and then selecting Taper from the resulting pop-up menu.
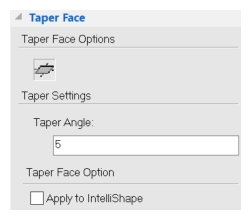
Taper Face Command Browser
Command Options:
-
Create Draft Plane. Use this option to specify a face as the desired draft plane.
-
Taper Angle Dialog Box: Use this dialog box to define the angle of the taper relative to the draft plane. Positive angles will subtract/add material on the positive/negative side of the draft plane.
Activation Methods:
Via Toolbar:
- Select the Taper Face button on the Face/Edge Edit toolbar.
- Select the face(s) that you would like to taper.
- Select the Create Draft Plane button on the Taper Face Command Browser.
- Select the face to use as the draft plane.
- Select the Preview button to preview the results, OR
- Select the Apply and Exit or Apply option (or Exit, if you don't want to apply the operation).
Via Menu:
- Select Modify, Taper Face from the menu bar.
- Select the face(s) that you would like to taper.
- Select the Create Draft Plane button on the Taper Face Command Browser.
- Select the face to use as the draft plane.
- Select the Preview button to preview the results, OR
- Select the Apply and Exit or Apply option (or Exit, if you don't want to apply the operation).
Via Mouse:
- Select the face(s) that you would like to move.
- Select Taper Face from the Quick Access Property Browser Actions or right-click on the selected face and select Taper from the pop-up menu.
- Select the Create Draft Plane button on the Taper Face Command Browser.
- Select the face to use as the draft plane.
- Select the Preview button to preview the results, OR
- Select the Apply and Exit or Apply option (or Exit, if you don't want to apply the operation).
The Face Editing Notification dialog will be displayed after completion of all activation methods, informing you that the highlighted IntelliShapes will be combined and that any future modifications must be made using the face editing tools. In light of this, it offers the option of proceeding with the operation or canceling it.
Available Selection Filters:
-
Face
-
Face by edge
-
Face by vertex
-
Faces by auto-feature
Example:
A polygon with a side face tapered relative to its top plane
NOTE: When using the Direct Face Modification commands, using the option "Apply to Intellishape" has intelligent capabilities to maintain the edited features original definition (sketch) if the modification is possible by altering its definition. This provides the user with more control in modification and maintains design intent when it may be unnecessarily lost in Direct Modifications.